Maintaining your RV roof is essential to extend its life and prevent costly repairs. Cleaning your RV roof regularly not only enhances its appearance but also protects it from damage caused by dirt, mold, and UV rays. Follow these expert tips to clean your RV roof effectively.
Why Cleaning Your RV Roof Matters
Neglecting your RV roof can lead to leaks, cracks, and costly repairs. By cleaning it, you can:
- Prolong its lifespan.
- Prevent water damage.
- Improve the efficiency of roof-mounted equipment like solar panels or AC units.
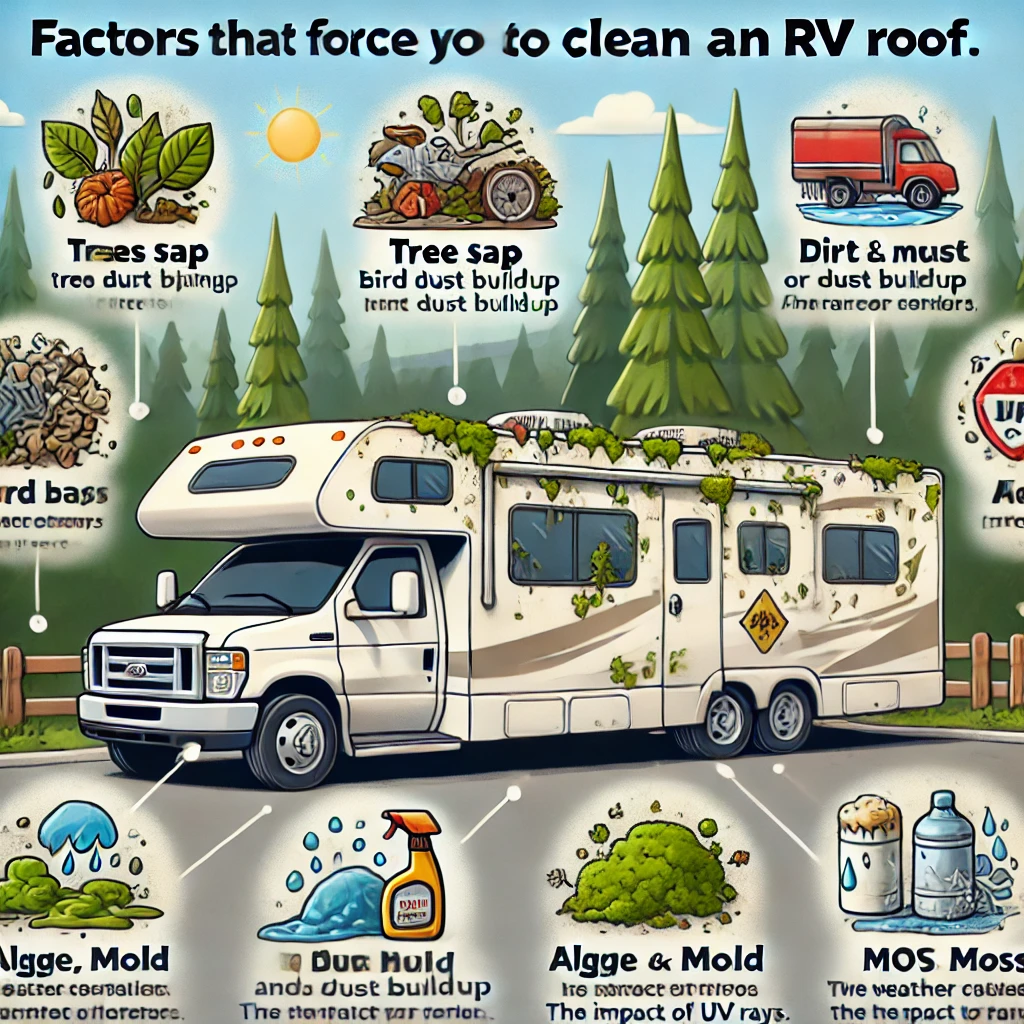
Factors That Force You to Clean an RV Roof
Keeping your RV roof clean is essential for maintaining its functionality and appearance. Several factors can make regular cleaning a necessity. Ignoring these can lead to costly damage or reduced lifespan of your RV roof. Let’s explore the key reasons why you must prioritize cleaning your RV roof.
1. Accumulation of Dirt and Debris
Over time, dirt, leaves, and other debris can gather on your RV roof. This buildup:
- Blocks drainage systems, causing water pooling.
- Increases the risk of leaks and damage.
- Reduces the efficiency of solar panels or roof-mounted equipment.
2. Exposure to Harsh Weather
Weather conditions significantly impact your RV roof:
- Rain and Snow: Lead to mold, mildew, and water damage if not cleaned promptly.
- UV Rays: Cause cracking and fading, especially on rubber roofs. Cleaning allows you to apply a UV protectant for added protection.
3. Tree Sap and Bird Droppings
Parking under trees exposes your RV to sticky sap and corrosive bird droppings. These substances:
- Are challenging to remove if left for long periods.
- Can damage the roof material, leading to staining or degradation.
4. Black Streaks on RV Sides
When dirt and grime from the roof wash down, they create unsightly black streaks on your RV’s sides. Regular roof cleaning prevents this and keeps your RV looking polished.
5. Preventing Leaks and Damage
Failing to clean the roof can lead to:
- Small cracks or damage going unnoticed.
- Water seeping through these cracks, causing interior damage.
Routine cleaning helps you spot and address these issues early.
6. Enhancing Roof-Mounted Equipment Efficiency
Dust and debris reduce the performance of:
- Solar panels.
- Air conditioners.
- Satellite dishes.
Cleaning your roof ensures these components operate at peak efficiency.
7. Maintaining Warranty Compliance
Many RV manufacturers require regular roof cleaning and maintenance to honor warranties. Neglecting this task could void your coverage in case of damage.

Methods to Clean an RV Roof
Cleaning an RV roof is essential to maintain its durability and appearance. There are various methods to clean your RV roof effectively, depending on its material and condition. Follow these expert-recommended techniques for a spotless and well-maintained RV roof.
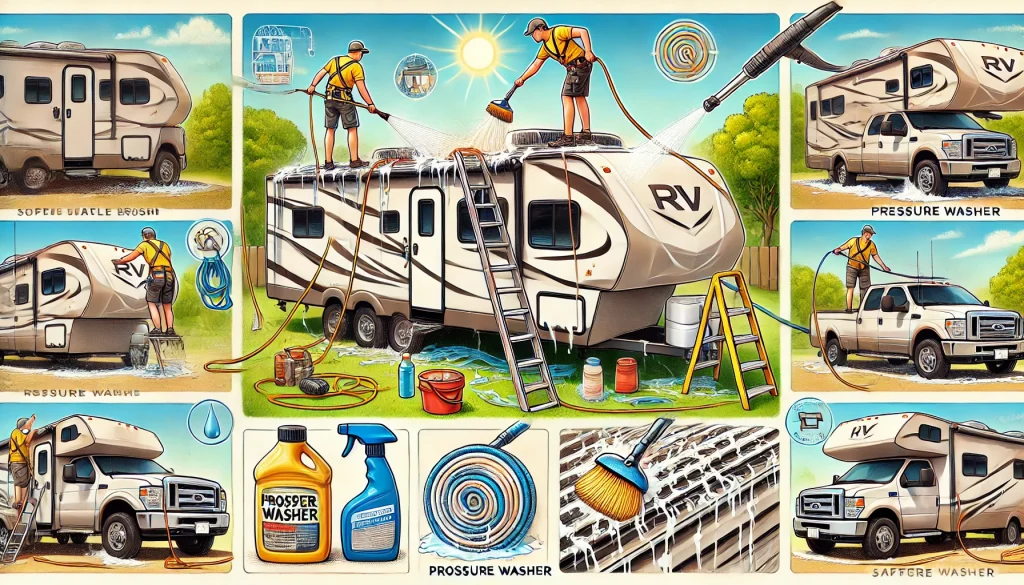
1. Manual Cleaning with a Soft Brush
Using a soft-bristle brush is one of the most common methods to clean an RV roof. This method is gentle and works well for all roof types.
Steps:
- Pre-rinse the roof with water to remove loose dirt.
- Apply a non-abrasive RV roof cleaner suited to your roof material.
- Scrub gently with a soft-bristle brush, focusing on stubborn stains.
- Rinse thoroughly with a garden hose to remove soap and debris.
Best For: Rubber, fiberglass, and metal roofs.
2. Pressure Washing
Pressure washing can save time but must be done carefully to avoid damage.
Steps:
- Use a low-pressure setting to avoid harming the roof material.
- Direct the spray at an angle to remove dirt and debris.
- Avoid spraying directly into seals or seams to prevent water intrusion.
Best For: Durable roof materials like fiberglass or aluminum. Avoid on older or damaged roofs.
3. Cleaning with Specialized Roof Cleaners
Many RV roof cleaners are designed for specific materials like rubber or fiberglass.
Steps:
- Spray the cleaner evenly across the roof.
- Let it sit for a few minutes to break down dirt and grime.
- Use a sponge or brush to scrub gently.
- Rinse thoroughly to remove all cleaner residue.
Best For: Regular maintenance and stubborn stains.
4. Using Eco-Friendly Cleaning Solutions
If you prefer environmentally friendly options, use a mixture of vinegar and water or biodegradable soap.
Steps:
- Mix one part vinegar with three parts water.
- Apply the solution to the roof and scrub with a soft brush.
- Rinse thoroughly to remove all residue.
Best For: Rubber and fiberglass roofs, especially for light cleaning.
5. Professional RV Roof Cleaning Services
If the roof is heavily soiled or hard to access, hiring a professional service may be the best choice.
Benefits:
- They use industry-grade tools and cleaners.
- They can inspect and repair roof damage during the cleaning process.
Best For: Older RVs, heavily soiled roofs, or when you lack time or tools.

Tips for Effective RV Roof Cleaning
- Always choose cleaners compatible with your roof material.
- Avoid abrasive tools or harsh chemicals that can damage the surface.
- Clean the roof in shaded areas to prevent cleaners from drying too quickly.
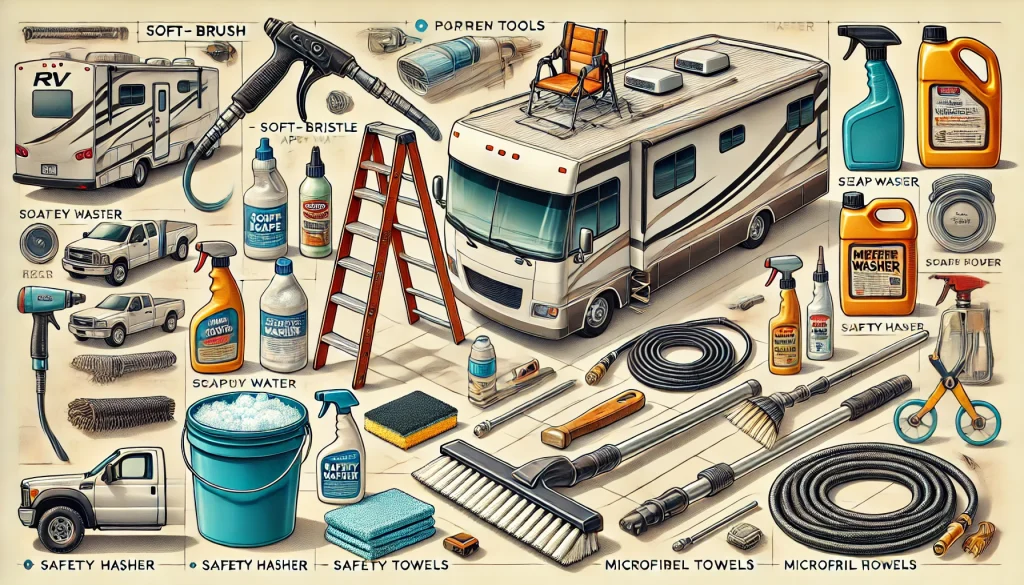
Essential Tools to Clean an RV Roof
Cleaning your RV roof is a crucial part of maintenance, but having the right tools can make the process faster, safer, and more effective. Here’s a list of essential tools you’ll need to ensure a spotless and well-maintained RV roof.
1. Soft-Bristle Brush
A soft-bristle brush is ideal for scrubbing dirt and grime without damaging the roof surface.
Why Use It?
- Prevents scratches on rubber, fiberglass, and aluminum roofs.
- Effectively removes dirt, stains, and algae buildup.
Tip: Look for brushes with an extendable handle for easier access.
2. Non-Abrasive RV Roof Cleaner
Choose a cleaner specifically designed for your RV roof material, such as rubber, fiberglass, or metal.
Why Use It?
- Safely breaks down dirt, mold, and sap without causing damage.
- Enhances roof durability by protecting against UV rays.
Tip: Avoid household cleaners as they can degrade roof materials.
3. Garden Hose or Low-Pressure Washer
A garden hose or low-pressure washer helps rinse off loose dirt and cleaning solutions.
Why Use It?
- Ensures thorough removal of soap and debris.
- Prevents streaks and residue buildup.
Tip: Use a low-pressure setting to avoid damaging seals or seams.
4. Ladder or Step Stool
A sturdy ladder or step stool provides safe access to your RV roof.
Why Use It?
- Allows you to reach the roof safely and comfortably.
- Ensures better visibility for a thorough clean.
Tip: Use a ladder stabilizer to prevent slipping or damage to the RV.
5. Microfiber Cloth or Sponge
For delicate scrubbing or wiping down sensitive areas, microfiber cloths or sponges are perfect.
Why Use It?
- Gentle on roof materials, especially on seals and vents.
- Ideal for applying protectants or cleaners in tight spaces.
6. UV Protectant Spray
A UV protectant spray adds a layer of protection against sun damage after cleaning.
Why Use It?
- Prevents cracking and fading on rubber and fiberglass roofs.
- Extends the lifespan of your roof.
Tip: Apply evenly after the roof has dried completely.
7. Protective Gear
Don’t forget your safety! Wear gloves, non-slip shoes, and protective eyewear.
Why Use It?
- Prevents injuries while working on slippery surfaces.
- Protects your hands and eyes from cleaning chemicals.

Optional Tools for Advanced Cleaning
- Extendable Scrubber: For RVs with taller roofs or hard-to-reach areas.
- Mildew Remover: If you frequently park in humid conditions.
- Roof Sealant: To fix minor cracks after cleaning.
Steps to Clean an RV Roof
Cleaning your RV roof is essential to maintain its durability, prevent leaks, and keep your vehicle looking great. Follow these step-by-step instructions to clean your RV roof effectively while protecting its surface.
1: Gather the Right Tools and Supplies
Before starting, ensure you have the necessary equipment:
- A ladder or step stool for safe roof access.
- A soft-bristle brush or sponge.
- RV-specific roof cleaner suitable for your roof material.
- A garden hose or low-pressure washer.
- Protective gear like gloves and non-slip shoes.
2: Park in a Safe, Shaded Area
Choose a level surface to park your RV. Cleaning in a shaded area prevents cleaning solutions from drying too quickly.
3: Pre-Rinse the Roof
- Use a garden hose to rinse off loose dirt, leaves, and debris.
- Pay extra attention to corners and areas around vents or seams.
- Avoid using high-pressure washers to prevent damage to seals and seams.
4: Apply RV Roof Cleaner
- Spray or spread the RV-specific cleaner evenly across the roof.
- Let it sit for the recommended time to loosen dirt, mold, and stains.
Tip: Always use a cleaner designed for your roof type, such as rubber (EPDM or TPO), fiberglass, or aluminum.
5: Scrub the Surface Gently
- Use a soft-bristle brush to scrub the roof in circular motions.
- Focus on stubborn spots but avoid harsh scrubbing to protect the surface.
- Check for any mold or mildew and scrub thoroughly.
6: Rinse Thoroughly
- Rinse the roof with clean water, ensuring all soap and debris are removed.
- Work from one end of the roof to the other to avoid missing spots.
7: Inspect for Damage
- After cleaning, inspect the roof for cracks, tears, or worn seals.
- Address minor issues immediately with appropriate roof sealant to prevent further damage.
8: Apply UV Protectant
- Once the roof is dry, apply a UV protectant to shield it from sun damage.
- This step is crucial for rubber and fiberglass roofs to prevent cracking and fading.
How to Clean an RV Roof for Different Classes
Cleaning your RV roof is essential, but the process can vary depending on the class of your RV and the roof material. Whether you own a Class A, Class B, or Class C RV, understanding the differences helps you clean effectively while protecting your roof’s integrity.
Class A RVs: Cleaning Large Roofs
Class A RVs are the largest and often have flat roofs, making cleaning more challenging due to the larger surface area.
Steps:
- Pre-Rinse Thoroughly: Use a garden hose to remove loose debris and dust.
- Use an RV-Specific Cleaner: Opt for a rubber or fiberglass cleaner, as Class A roofs are often made of these materials.
- Scrub Gently: Use a soft-bristle brush with an extendable handle to reach every corner.
- Rinse and Dry: Ensure all soap is rinsed off to prevent streaks.
Tips:
- Apply a UV protectant to prevent sun damage.
- Check for cracks or worn seals during cleaning.
Class B RVs: Compact and Rounded Roofs
Class B RVs are smaller with curved roofs, which require extra care to avoid slipping.
Steps:
- Safety First: Use a ladder or step stool for roof access and wear non-slip shoes.
- Apply Cleaner: Spray a non-abrasive cleaner suitable for fiberglass or aluminum roofs.
- Wipe Gently: Use a sponge or microfiber cloth to clean the roof, as excessive scrubbing can damage the material.
- Rinse Quickly: Use a garden hose to rinse away the cleaner before it dries.
Tips:
- Avoid pressure washers, as they can damage the rounded edges and seams.
- Clean more frequently if parked under trees to remove sap and debris.
Class C RVs: Mid-Size Roofs with Varying Materials
Class C RVs often have roofs made of rubber (EPDM or TPO) or fiberglass. Their mid-size structure makes them easier to clean than Class A roofs but larger than Class B.
Steps:
- Pre-Clean: Remove leaves, twigs, and dust with a broom or hose.
- Use Rubber Roof Cleaner: For EPDM or TPO roofs, choose a rubber-specific cleaner.
- Scrub in Sections: Divide the roof into sections for more manageable cleaning.
- Inspect the Roof: After rinsing, check for cracks or potential leaks, especially around vents.
Tips:
- Clean the roof every three months or more often in harsh weather conditions.
- Add a roof sealant as needed to maintain its integrity.
Do You Need a Professional to Clean an RV Roof, or Can You Do It Yourself?
Cleaning an RV roof is a vital maintenance task that can be done either professionally or as a DIY project. Whether you should hire a professional or do it yourself depends on factors like your time, experience, tools, and the condition of your RV roof. Let’s explore the pros and cons of each option.
DIY RV Roof Cleaning: Is It Right for You?
Cleaning your RV roof yourself can save money and give you hands-on control.
Pros:
- Cost-Effective: You save on labor costs, which can be significant for professional services.
- Flexible Timing: You can clean your roof whenever it’s convenient.
- Attention to Detail: You can inspect your roof closely for damage during the cleaning process.
Cons:
- Requires Tools and Supplies: You’ll need a soft-bristle brush, ladder, RV-specific cleaner, and protective gear.
- Physical Effort: Cleaning an RV roof can be physically demanding, especially for larger RVs.
- Safety Risks: Slippery surfaces and high roofs can pose safety hazards without proper precautions.
Best For: RV owners who are comfortable with DIY tasks and have the time and tools to do the job.
Professional RV Roof Cleaning: When Should You Hire Help?
Hiring a professional ensures a thorough and hassle-free cleaning.
Pros:
- Expertise: Professionals know how to clean various roof types safely and efficiently.
- Comprehensive Service: Many services include inspections and minor repairs.
- Saves Time: Ideal for busy RV owners who lack the time or tools for cleaning.
Cons:
- Costly: Professional cleaning can be expensive, especially for larger RVs.
- Scheduling Required: You may need to book in advance, which could delay the cleaning process.
Best For: RV owners with heavily soiled roofs, limited mobility, or those uncomfortable with climbing and scrubbing.
Factors to Consider When Deciding
- Condition of the Roof:
- DIY cleaning works for routine maintenance.
- Hire a professional if the roof has extensive mold, cracks, or damage.
- Roof Material:
- Rubber, fiberglass, and aluminum roofs can be cleaned DIY with the right supplies.
- Complex roof designs or older RVs may benefit from professional care.
- Time and Effort:
- DIY is time-consuming but rewarding for hands-on owners.
- Professional services are quicker and more convenient.
- Safety Concerns:
- If you’re uncomfortable working on ladders or roofs, hiring a professional is the safer choice.
Common Mistakes When Cleaning an RV Roof and Their Solutions
Cleaning your RV roof is crucial for maintaining its durability and preventing damage. However, many RV owners make mistakes during the cleaning process that can harm the roof or reduce its lifespan. Below, we’ll explore these common mistakes and provide effective solutions to help you avoid them.
1. Using the Wrong Cleaning Products
Mistake:
Using harsh chemicals like bleach, ammonia, or household cleaners can damage the roof material, especially rubber or fiberglass.
Solution:
- Always use RV-specific roof cleaners designed for your roof type.
- Check the manufacturer’s recommendations for suitable cleaning products.
2. Scrubbing with Abrasive Tools
Mistake:
Using hard-bristle brushes, steel wool, or abrasive pads can scratch or tear the roof surface.
Solution:
- Use a soft-bristle brush or a microfiber cloth to clean the roof gently.
- For stubborn stains, let the cleaner soak in before scrubbing.
3. Neglecting Safety Precautions
Mistake:
Standing on a slippery roof without proper gear increases the risk of falls or injuries.
Solution:
- Wear non-slip shoes and consider using a safety harness.
- Clean the roof from a sturdy ladder if you’re uncomfortable climbing on it.
4. Ignoring the Roof’s Condition
Mistake:
Cleaning without inspecting for damage may worsen existing cracks or leaks.
Solution:
- Inspect the roof thoroughly before cleaning.
- Address any cracks, tears, or loose seals with appropriate roof sealants before proceeding.
5. Skipping Pre-Rinsing
Mistake:
Failing to rinse off dirt and debris beforehand can lead to streaking or make cleaning harder.
Solution:
- Pre-rinse the roof with a garden hose to remove loose debris.
- This prevents dirt from spreading during scrubbing.
6. Using High-Pressure Washers
Mistake:
High-pressure washers can damage seals, seams, and the roof material, leading to leaks.
Solution:
- Use a garden hose or a low-pressure washer for rinsing.
- Keep the nozzle at a safe distance from the roof surface.
7. Cleaning in Direct Sunlight
Mistake:
Cleaning under direct sunlight causes cleaners to dry too quickly, leaving streaks or residue.
Solution:
- Clean the roof in the shade or during cooler parts of the day.
- Work in sections to avoid cleaners drying prematurely.
8. Neglecting to Rinse Thoroughly
Mistake:
Leaving behind cleaning residue can attract dirt and cause discoloration over time.
Solution:
- Rinse the roof thoroughly with clean water after scrubbing.
- Double-check for any leftover soap or residue.
9. Forgetting to Protect the Roof After Cleaning
Mistake:
Skipping post-cleaning maintenance, like applying UV protectants, can leave the roof exposed to sun damage.
Solution:
- After cleaning, apply a UV protectant or conditioner suitable for your roof material.
- This adds a protective layer against UV rays and extends the roof’s lifespan.
10. Overlooking Safety for Roof-Mounted Equipment
Mistake:
Damaging solar panels, vents, or air conditioners during cleaning.
Solution:
- Cover delicate equipment with protective material before cleaning.
- Use a sponge or cloth to clean around these areas gently.
Safety Precautions to Clean an RV Roof
Cleaning an RV roof can be a challenging task, especially since it involves working at heights and dealing with slippery surfaces. Prioritizing safety ensures you can clean your RV roof effectively without the risk of injury. Follow these essential safety precautions to protect yourself and your RV during the cleaning process.
1. Use Proper Safety Gear
Wearing the right gear can prevent accidents while cleaning the roof.
Essential Gear:
- Non-Slip Shoes: Provides traction on wet or slippery surfaces.
- Gloves: Protects your hands from cleaning chemicals and sharp edges.
- Safety Glasses: Shields your eyes from splashes of cleaning solutions.
2. Work on a Stable Surface
A secure footing is crucial when accessing your RV roof.
Precautions:
- Use a sturdy ladder with a stabilizer to prevent tipping.
- Avoid placing the ladder on uneven or soft ground.
- Test the ladder’s stability before climbing.
Tip: Have someone hold the ladder while you climb for added safety.
3. Avoid Cleaning Alone
Having a second person nearby can be a lifesaver in case of emergencies.
Why It’s Important:
- They can provide immediate assistance if you fall or slip.
- They can hand you tools, reducing unnecessary movement.
4. Check Roof Conditions Before Climbing
Inspect the roof to ensure it’s safe to walk on.
What to Look For:
- Weak spots, cracks, or tears that could give way under your weight.
- Accumulated debris like leaves or sap that may cause slipping.
5. Use a Safety Harness for Extra Protection
A safety harness offers added security, especially for larger RVs.
How to Use:
- Anchor the harness securely to a fixed point on the RV or nearby structure.
- Ensure the harness fits snugly and is rated for your weight.
6. Avoid Overreaching
Stretching too far can throw you off balance.
Tips to Avoid Overreaching:
- Use an extendable handle for brushes and mops to clean hard-to-reach areas.
- Move the ladder or change your position instead of leaning excessively.
7. Clean in Favorable Weather
The weather can significantly impact safety when cleaning your RV roof.
Ideal Conditions:
- Dry, mild weather without strong winds.
- Avoid cleaning in rain, snow, or during extreme heat, as surfaces become slippery or dangerously hot.
8. Be Cautious with Cleaning Tools
Improper handling of tools can lead to accidents.
Precautions:
- Keep tools like brushes and hoses organized to avoid tripping.
- Avoid using electrical tools near water to prevent shocks.
9. Protect Roof-Mounted Equipment
Avoid damaging or slipping on items like vents, antennas, and solar panels.
Steps to Protect Equipment:
- Cover fragile equipment with protective material during cleaning.
- Clean around these items gently using a sponge or cloth.
10. Take Breaks to Avoid Fatigue
Cleaning an RV roof can be tiring and lead to mistakes if you’re not careful.
How to Stay Safe:
- Take short breaks if the task is physically demanding.
- Stay hydrated, especially when working in warm weather.
Final Thoughts
Cleaning an RV roof safely requires careful preparation and attention to detail. By wearing the right gear, securing your footing, and working with a partner, you can avoid accidents and complete the task efficiently. Prioritizing safety not only protects you but also ensures your RV roof is cleaned without damage.
More related info will be available at Flamingo Motorhomes.

