RV toilets are designed for convenience and efficiency, providing a compact waste management solution for travelers. Unlike residential toilets, RV toilets work with minimal water and specialized waste systems to handle the unique challenges of life on the road. Let’s dive into the details of how RV toilets function and why they are essential for every RV enthusiast.
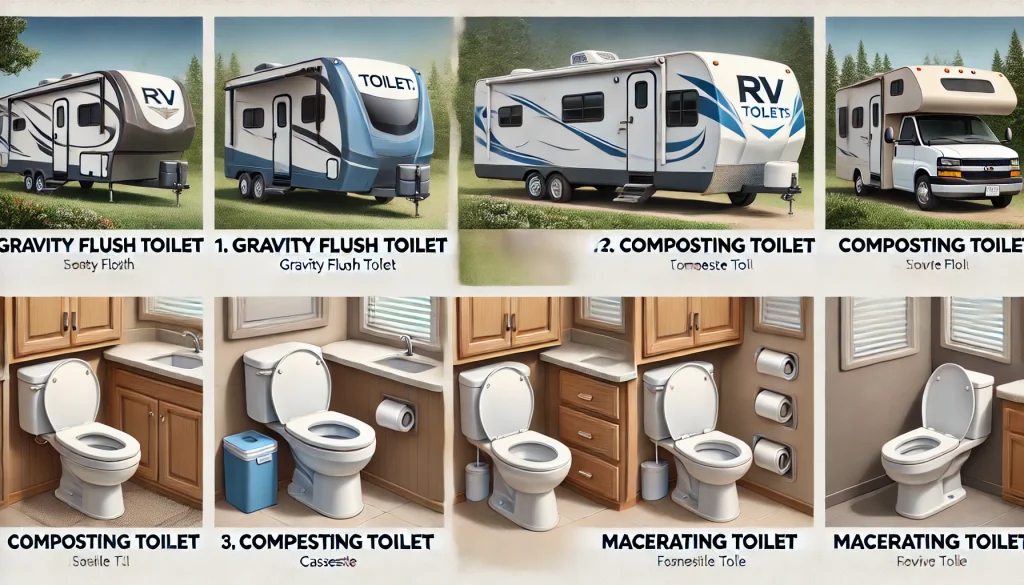
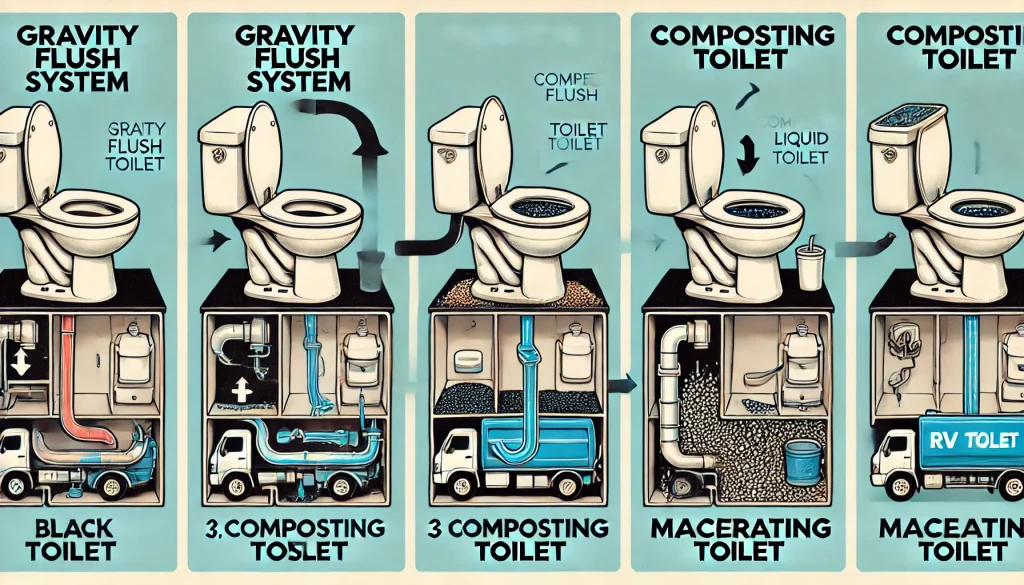
Types of RV Toilets
Gravity-Flush Toilets
Gravity-flush RV toilets use the natural pull of gravity to move waste into the holding tank. When you flush, water rinses the bowl and directs waste into the tank below. This simple design is the most common type in motorhomes and travel trailers.
Macerating Toilets
Macerating toilets grind waste into a slurry before sending it to the holding tank. These are perfect for RVs with flexible layouts since they allow for more plumbing options.
Composting Toilets
For eco-conscious RVers, composting toilets decompose waste into compost using natural processes. These systems don’t require a holding tank and are ideal for off-grid camping.
How RV Toilets Operate
Water-Saving Design
RV toilets use a small amount of water to flush, conserving resources. A foot pedal or lever activates the flush mechanism, releasing water from your RV’s freshwater tank.
Holding Tanks
Waste is directed into a black water holding tank located beneath your RV. This tank must be emptied at a designated dump station to maintain cleanliness and prevent odors.
Ventilation and Seals
RV toilets are equipped with seals to prevent leaks and odors. Vent pipes help expel gases, ensuring a comfortable living environment.
Tips for Maintaining Your RV Toilet
Use RV-Safe Toilet Paper
Always use RV-specific toilet paper to prevent clogs and protect your holding tank system.
Regular Tank Cleaning
Flush your black water tank regularly with a tank cleaner to avoid buildup and unpleasant smells.
Prevent Leaks
Inspect seals and gaskets frequently for wear and replace them as needed.
Knowing how RV toilets work ensures a hassle-free travel experience. Proper usage and maintenance can extend the life of your system and keep your RV fresh and clean.
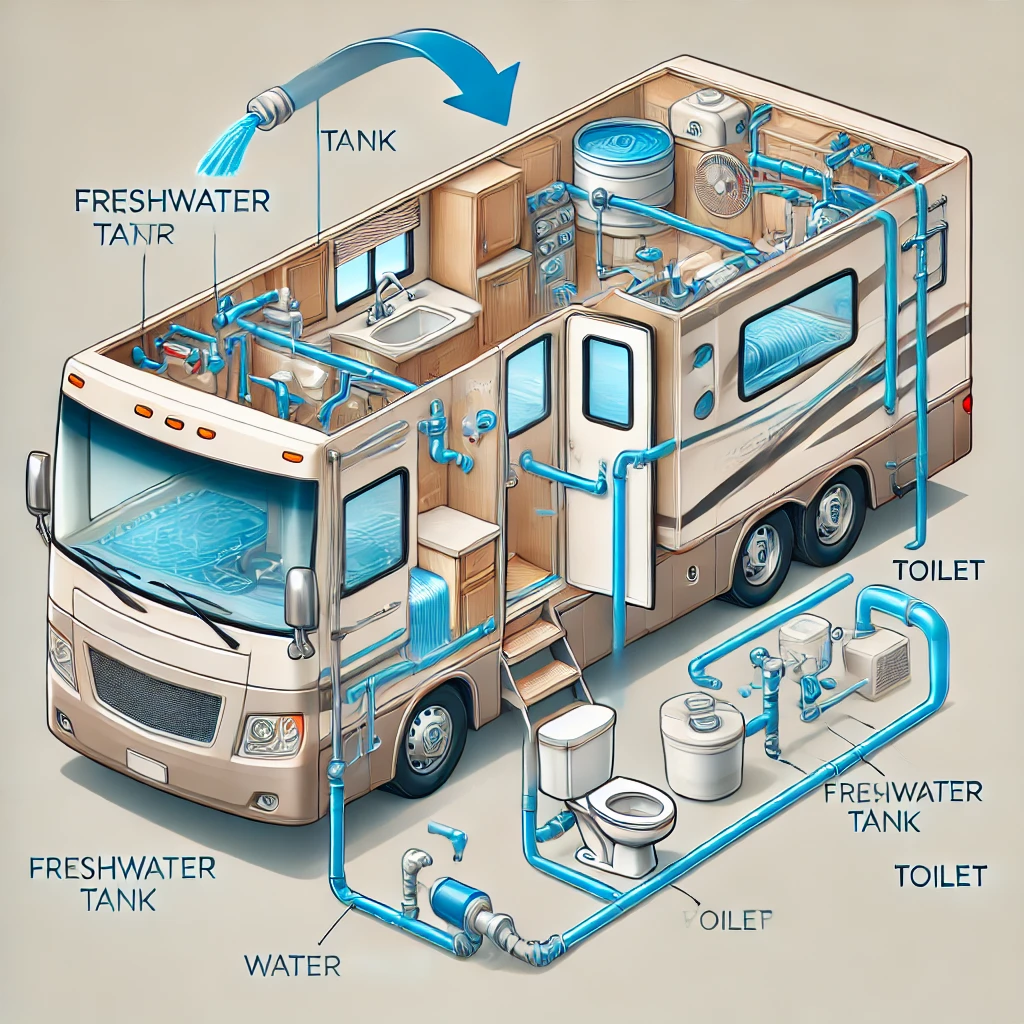
How Does Water Get to the Toilet in an RV?
Water supply to an RV toilet is a carefully designed system that ensures convenience and efficiency, even while on the move. Understanding how water flows to your RV toilet can help you maintain the system and avoid common issues. Let’s explore how this essential component works.
RV Toilet Water Supply Basics
RV toilets get their water from the freshwater tank or a city water connection, depending on your setup. These systems ensure a steady flow of water, whether you’re camping off-grid or hooked up at a campsite.
Water Sources for RV Toilets
1. Freshwater Tank
When you’re not connected to an external water source, your RV toilet uses water stored in the onboard freshwater tank. A 12-volt water pump draws water from the tank and sends it to the toilet when you flush. This pump ensures consistent pressure, even when you’re boondocking.
2. City Water Connection
At campsites, you can connect your RV to a city water supply using a hose. This bypasses the freshwater tank, delivering water directly to your RV’s plumbing system under pressure.
The Flushing Mechanism
Foot Pedal or Handle
Most RV toilets are equipped with a foot pedal or handle that controls water flow. Pressing the pedal or pulling the handle releases water into the toilet bowl from the water supply.
Water Saver Features
Modern RV toilets often have features to minimize water usage. For example, some systems let you control how much water enters the bowl, making them eco-friendly and ideal for conserving resources during long trips.
Troubleshooting Water Issues
Low Water Pressure
If water pressure is weak, check your water pump or the city water connection. Ensure there are no kinks in the hose or blockages in the line.
No Water Flow
If no water reaches the toilet, inspect the freshwater tank level, pump function, and any valves that may be closed.
Leaks Around the Toilet
Leaks could indicate a worn-out seal or loose connection. Address these issues promptly to prevent water damage.
How Does Water Get to the Toilet in an RV?
Water reaches the toilet in an RV through a straightforward but effective plumbing system, ensuring convenience for travelers. Whether you’re camping off-grid or connected to a campsite water supply, understanding this process helps keep your RV in perfect working order.
Water Sources for RV Toilets
1. Freshwater Tank and Pump
When you’re not connected to an external source, the RV’s freshwater tank supplies water. A 12-volt water pump draws water from the tank and delivers it under pressure to the toilet and other fixtures. This setup is essential for boondocking or remote camping.
2. City Water Connection
At campgrounds, you can hook up your RV to a city water supply using a hose. This bypasses the need for the freshwater tank and pump, providing consistent water flow directly to the toilet and plumbing system.
The Flushing Process
When you flush the RV toilet:
- Foot Pedal or Handle Activation: Engaging the pedal or handle releases water from the connected supply.
- Direct Delivery: The water flows directly to the toilet bowl, rinsing waste into the black water holding tank.
Common Issues and Solutions
Low Water Pressure
- Check for kinks in hoses or blockages in water lines.
- Ensure the water pump is functioning correctly if using the freshwater tank.
No Water Flow
- Verify the freshwater tank has enough water.
- Inspect the pump or ensure the city water connection is properly attached.
Leaks Around the Toilet
- Inspect seals and connections for wear or damage. Replace if necessary.
Tips to Keep Your Water System Running Smoothly
- Always monitor your freshwater tank levels and refill when needed.
- Use a water pressure regulator when connecting to city water to prevent damage to the plumbing.
- Regularly inspect hoses, connections, and the water pump to catch potential issues early.
Understanding your RV’s water system ensures proper operation and helps you address minor problems before they escalate. With a reliable water supply, your RV adventures will be stress-free and comfortable.
Where Do You Empty an RV Toilet?
Emptying your RV toilet is an essential part of maintaining a clean and functional waste system. The process involves safely disposing of the contents of your black water holding tank, which collects waste from your RV toilet. Knowing where and how to do this properly is crucial for an enjoyable RV experience.
Dump Stations: The Best Place to Empty Your RV Toilet
1. Campground Dump Stations
Most campgrounds offer dump stations for guests to empty their black water and gray water tanks. These are specifically designed for safe and hygienic waste disposal.
2. Public Dump Stations
Many gas stations, rest stops, and RV parks have public dump stations available for a small fee or even free. Use apps or websites like Sanidumps or Campendium to locate nearby dump stations.
3. RV-Friendly Locations
Some businesses, like truck stops or outdoor retailers, also provide RV dumping services. Always check beforehand to confirm availability.
How to Empty an RV Toilet at a Dump Station
Step-by-Step Process:
- Prepare Your Supplies:
Use an RV sewer hose, gloves, and any required connectors. - Locate the Black Water Valve:
Attach the sewer hose to the black water outlet on your RV and connect the other end to the dump station inlet. - Empty the Black Water Tank First:
Open the black water valve to release waste. Let it fully drain. - Rinse and Follow with the Gray Water Tank:
After the black tank, empty the gray water tank to flush out any residue in the hose. - Clean and Store Equipment:
Rinse your sewer hose thoroughly, store it securely, and wash your hands.
Important Tips for Emptying an RV Toilet
- Use RV-Safe Chemicals: Add tank treatment chemicals to break down waste and control odors.
- Check Local Laws: Always use designated dump stations to comply with environmental regulations.
- Dump Responsibly: Avoid overfilling your black water tank to prevent messy situations.
How Often Does an RV Toilet Need to Be Emptied?
The frequency of emptying an RV toilet depends on the size of your black water tank, the number of people using it, and how often the toilet is flushed. Regular maintenance is key to preventing unpleasant odors and avoiding tank overflows. Here’s a breakdown to help you plan.
Factors That Determine Emptying Frequency
1. Tank Size
Most RV black water tanks range from 20 to 50 gallons. A smaller tank will fill up faster, requiring more frequent dumping.
2. Number of Occupants
The more people using the toilet, the quicker the tank will fill. For example:
- A couple may need to empty the tank every 3 to 5 days.
- A family of four might need to dump every 1 to 3 days.
3. Usage Habits
Frequent flushing or excessive water usage will fill the tank more quickly. Using water-conserving methods can extend the time between emptying.
Signs Your RV Toilet Needs to Be Emptied
- Tank Level Indicators: Most RVs have a monitor panel showing the black tank’s fill level. Empty the tank when it reaches two-thirds full.
- Slow Draining or Backup: A slow flush can indicate the tank is nearing capacity.
- Odors: Strong smells often mean the tank needs to be emptied or treated.
Recommended Dumping Schedule
To stay ahead of issues:
- Full-Time RVers: Empty the tank every 3 to 5 days.
- Weekend Campers: Empty the tank before returning home, even if it isn’t full.
Tips to Extend the Time Between Dumps
- Use water-saving flush techniques, such as partial flushes for liquids.
- Add RV-safe chemicals to break down waste and minimize odors.
- Avoid overfilling the black tank, as this can lead to messy and difficult cleanups.
Consistently emptying your RV toilet prevents tank overflow, unpleasant smells, and plumbing problems. By keeping an eye on your black water tank’s level and sticking to a routine, you’ll ensure a cleaner, more enjoyable RV experience.
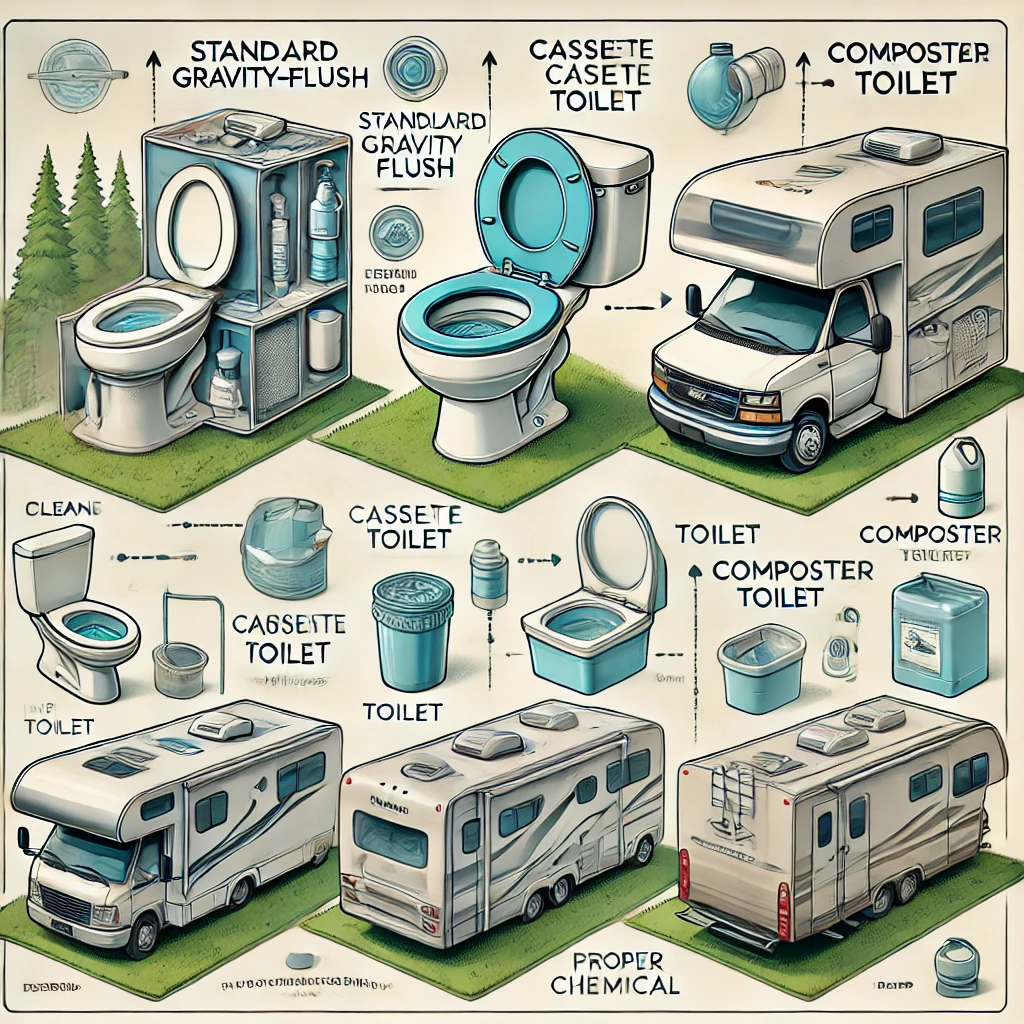
How to Maintain Different Toilets Across RV Classes
RV toilets vary across classes, from the compact models in Class B motorhomes to more sophisticated systems in luxury Class A rigs. Proper maintenance ensures these toilets work efficiently, regardless of your RV type. Here’s how to care for the different toilets found in each RV class.
Maintenance for Class A Motorhome Toilets
Features:
Class A RVs often have gravity-flush toilets or macerating systems, similar to residential units.
Maintenance Tips:
- Use RV-Safe Toilet Paper: Prevent clogs in the larger but more complex plumbing systems.
- Regularly Flush the Black Tank: Use a tank rinser or wand to keep the system clean.
- Inspect the Macerator: For macerating systems, ensure blades are free of debris and lubricate parts as needed.
- Monitor Water Levels: These toilets use more water, so check your freshwater tank regularly.
Maintenance for Class B RV Toilets
Features:
Class B motorhomes often use cassette toilets or composting toilets for compact convenience.
Maintenance Tips:
- Empty Cassette Toilets Frequently: Dispose of waste every 1 to 3 days at appropriate dump points.
- Clean Seals and Valves: Apply seal lubricant to prevent leaks.
- For Composting Toilets: Regularly stir the compost material and empty the solid and liquid compartments separately.
Maintenance for Class C Motorhome Toilets
Features:
Class C RVs typically have gravity-flush toilets with smaller holding tanks.
Maintenance Tips:
- Clean Bowl and Seal Weekly: Use non-abrasive cleaners to avoid damaging components.
- Deodorize the Black Tank: Use RV-safe chemicals to break down waste and minimize odors.
- Flush System After Each Trip: Empty and rinse the black water tank thoroughly to prevent residue buildup.
Maintenance for Fifth-Wheel and Travel Trailer Toilets
Features:
These RVs usually feature gravity-flush toilets, but larger models may have macerating systems or portable toilets.
Maintenance Tips:
- Secure Portable Toilets: For portable models, ensure they are tightly sealed to prevent leaks while traveling.
- Check Water Connections: Inspect hoses and valves for leaks, especially if the toilet is connected to a city water supply.
- Treat the Tank: Add tank treatments after every emptying to prevent buildup.
General Toilet Maintenance Tips for All RV Classes
1. Use the Right Products
- Only use RV-safe toilet paper and cleaning solutions to avoid clogging and damage.
2. Empty Tanks Regularly
- Don’t wait for tanks to overfill. Dump at two-thirds full to prevent strain on seals and hoses.
3. Keep Seals Lubricated
- Apply silicone-based seal lubricants to prevent leaks and maintain a proper seal.
4. Clean Regularly
- Wipe down the toilet bowl and surrounding area weekly to prevent stains and odors.
5. Avoid Overusing Water
- Use water conservatively to avoid filling the tank too quickly, especially for smaller systems.
More related info will be available on Flamingo Motorhomes.